Making a Mural
Many people often inquire about my approach to creating large-scale typographic murals so I thought I would take this opportunity to explain my process. There are various methods to scale up artwork for murals, including projection, measurements, transferring artwork using a paper template, a square grid, and a technique known as the "scribble grid”, also known as the “doodle grid”. I have tried all of these techniques over the years, however, in this explanation I will delve into my mural creation process using the scribble grid technique. It generates the most inquiries when people observe my work in progress plus it is one of my favourite methods to use.
When I initially ventured into street art, I would loosely freehand lettering onto walls using spray paint. As the years passed, my lettering skills grew more precise, and I began receiving mural commissions from clients. To present my proposed mural concept, I would provide clients with digital artwork, which in turn required a precise scaling up onto a physical wall. I had observed other street artists using the scribble grid technique on Instagram, encouraging me to research the technique and adapt it to my projects. Here are the steps I follow.
Materials Needed for the Scribble Grid Technique:
Computer, iPad, or Phone
Artwork in digital format
Software like Procreate or Photoshop
Digital Camera or a phone/tablet with a camera
Spray paint, masking tape or chalk
The Process:
Capture a Photo: Start by taking a photograph of the wall where you intend to paint the mural. This photo serves as the canvas for designing your mural artwork.
Digital Design: Import the wall photo into a digital design tool like Procreate on your iPad or Photoshop on your computer. Create a new layer above the photo and create your mural artwork. This digital representation helps you visualize how the mural will appear in its intended location and allows you to consider any obstructions such as pipes or electrical boxes.
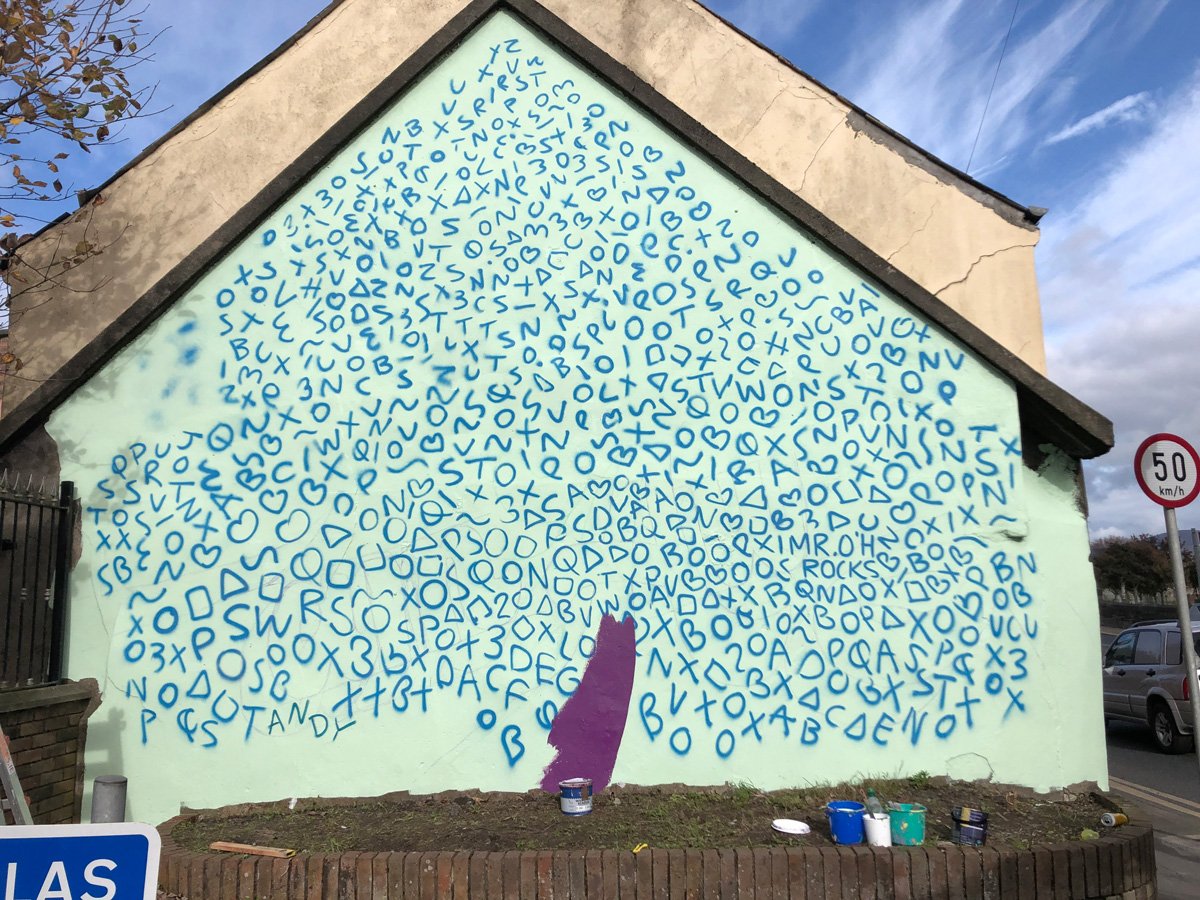
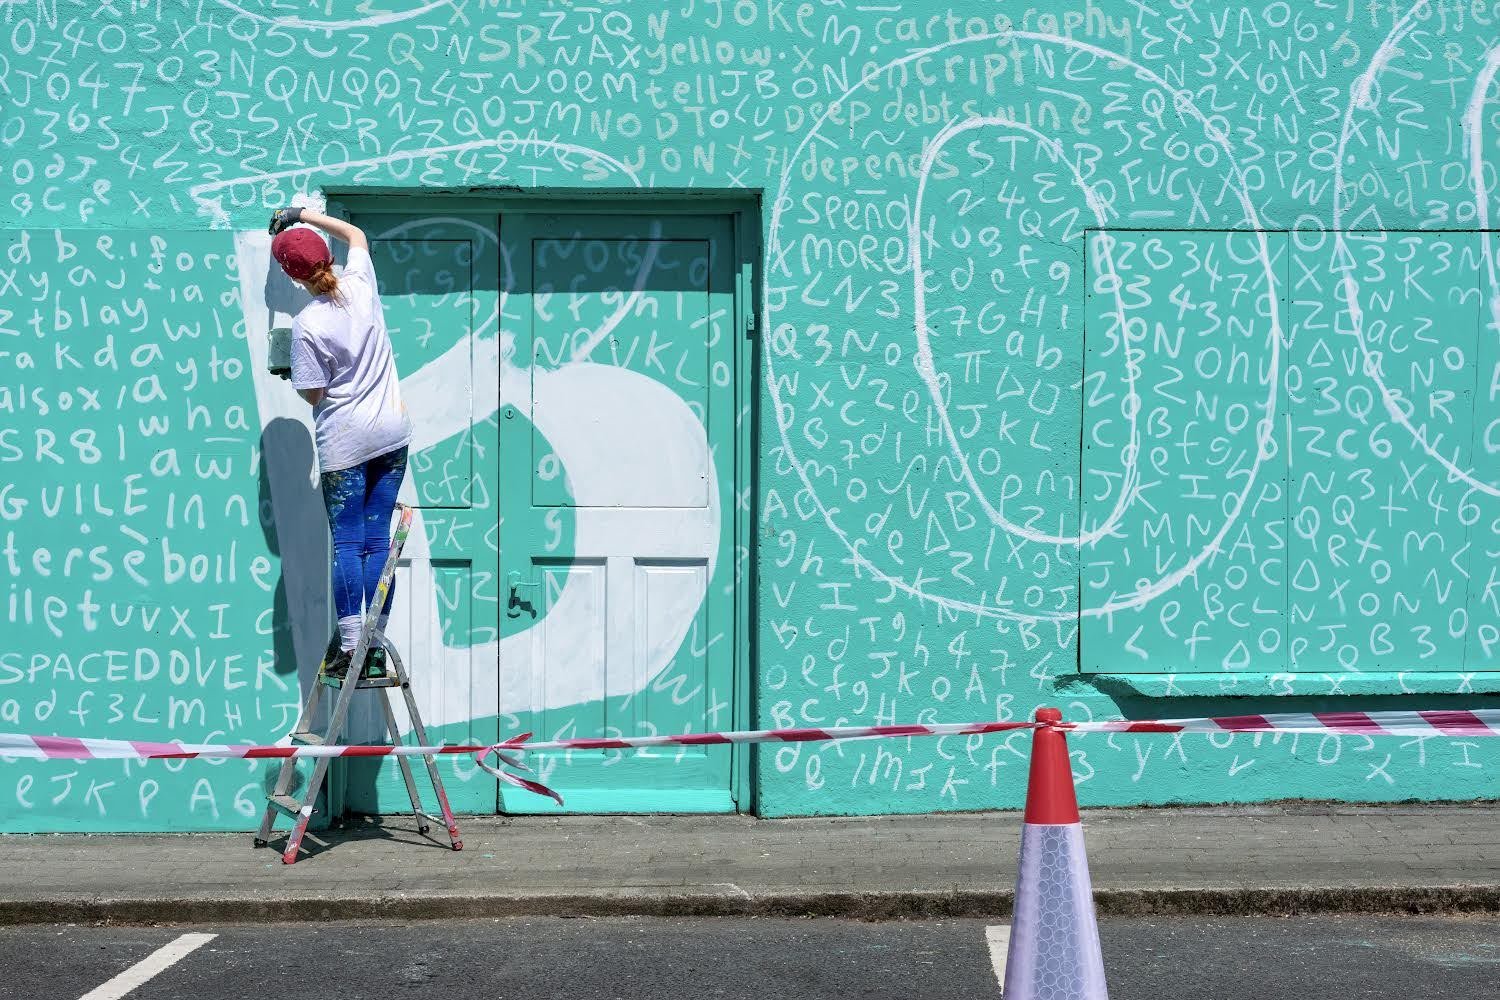
Create Scribbles: This is the fun part! Begin drawing scribbles on the actual wall. You can use letters, numbers, or random simple shapes for this purpose. Utilize brush paint, spray paint, masking tape or chalk to mark out the scribble grid. When using paint, consider that it will need to be painted over, while masking tape or chalk can be easily removed.
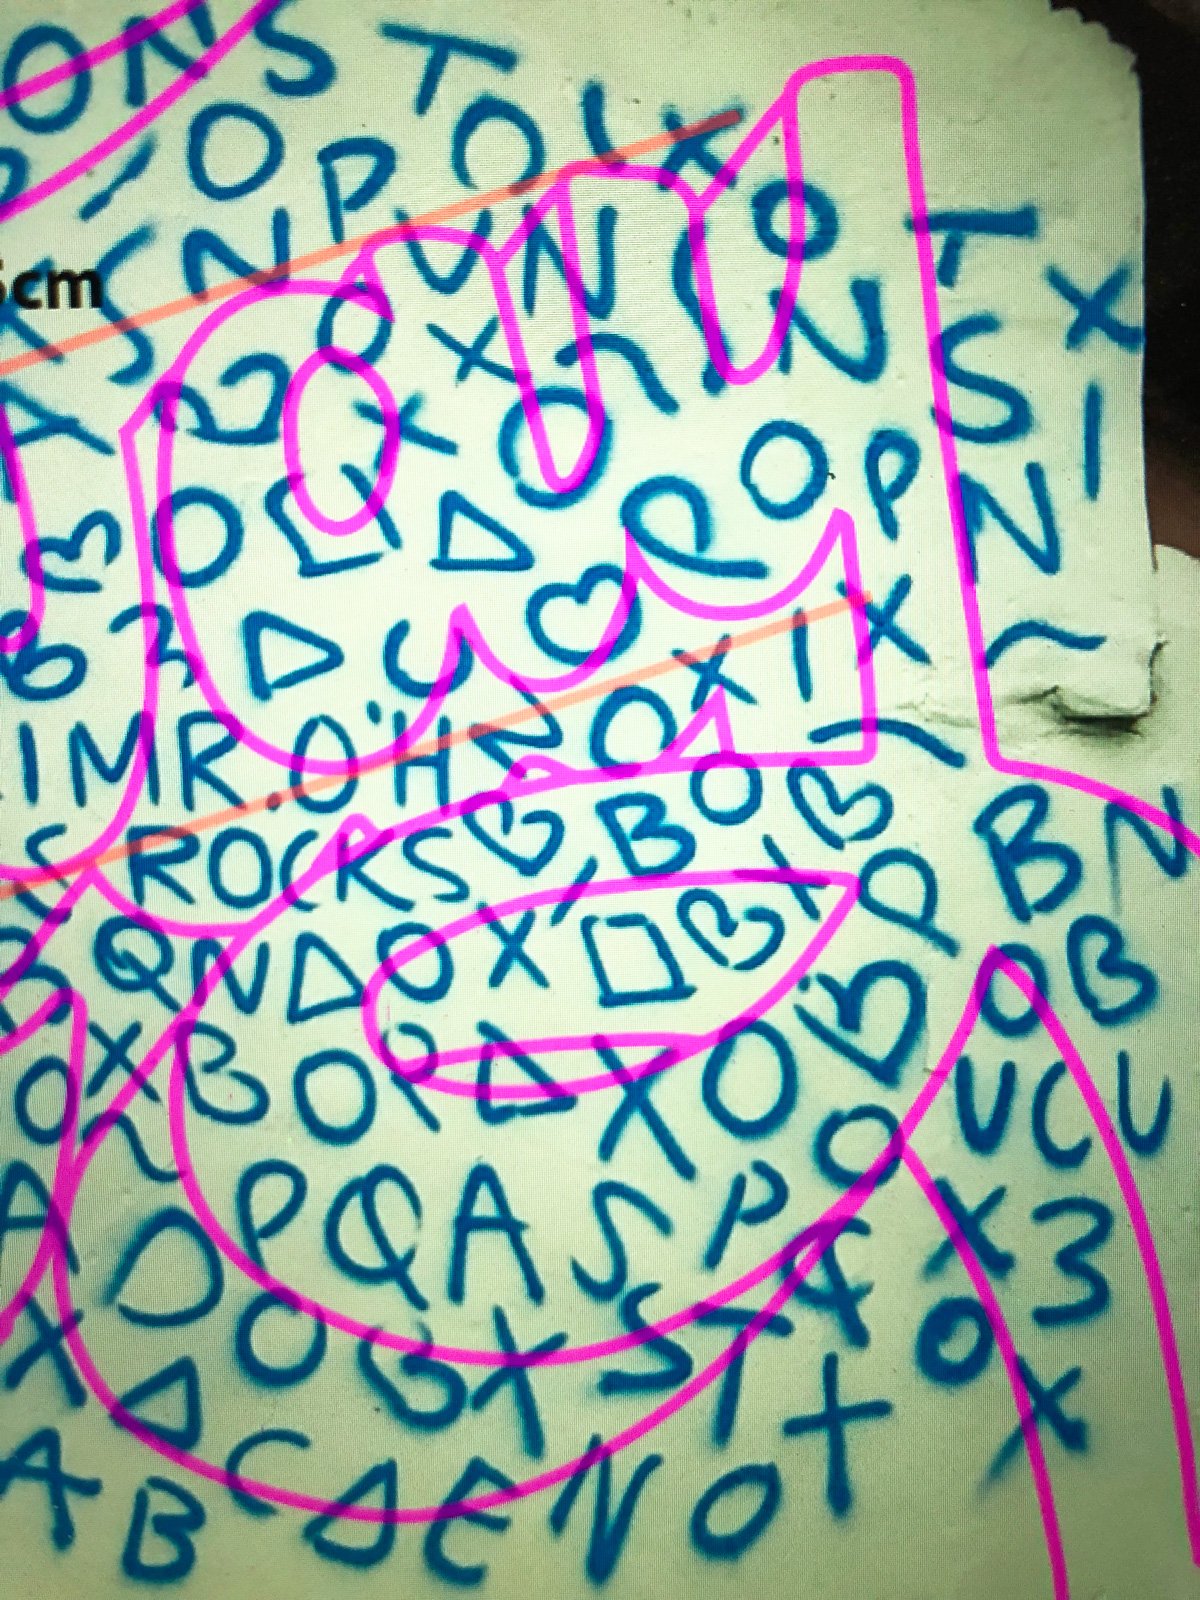
Second Photo: After covering the wall with scribbles, take another photo of the wall from the exact same location as the first one. Import this photo into your digital design tool.
Overlay Artwork: Overlay your final artwork over the scribbles in the digital design tool. Position it precisely as presented to the client or as you feel works best for a personal project. Reduce the opacity of the artwork so that you can see the scribbles through it. You may also create an outline of the artwork and overlay it on the photo of the wall, reducing the opacity of the outlines for better visibility of the scribbles.
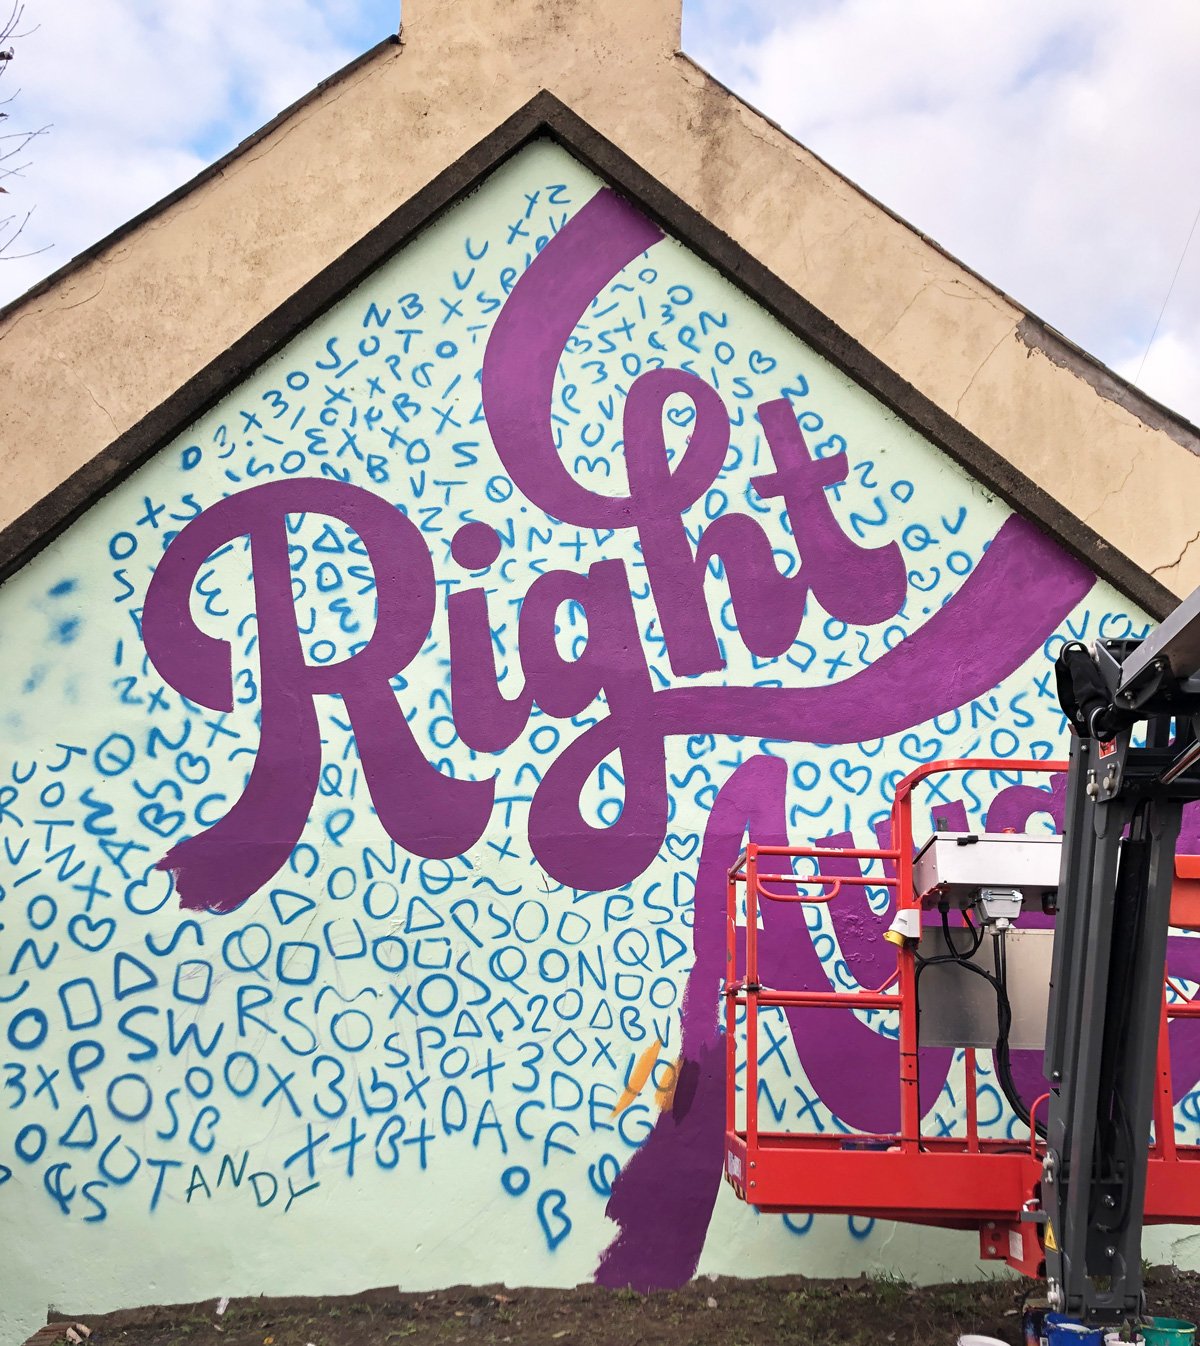
Use as Template: This overlaid image becomes your reference for painting the artwork on a large scale. You can start to mark out your artwork using the squiggle grid as a guide, referring to where your artwork intersects with the different shapes. Transfer the image to your phone for easy reference while sketching up and painting the mural. Be prepared for some minor adjustments as you proceed.
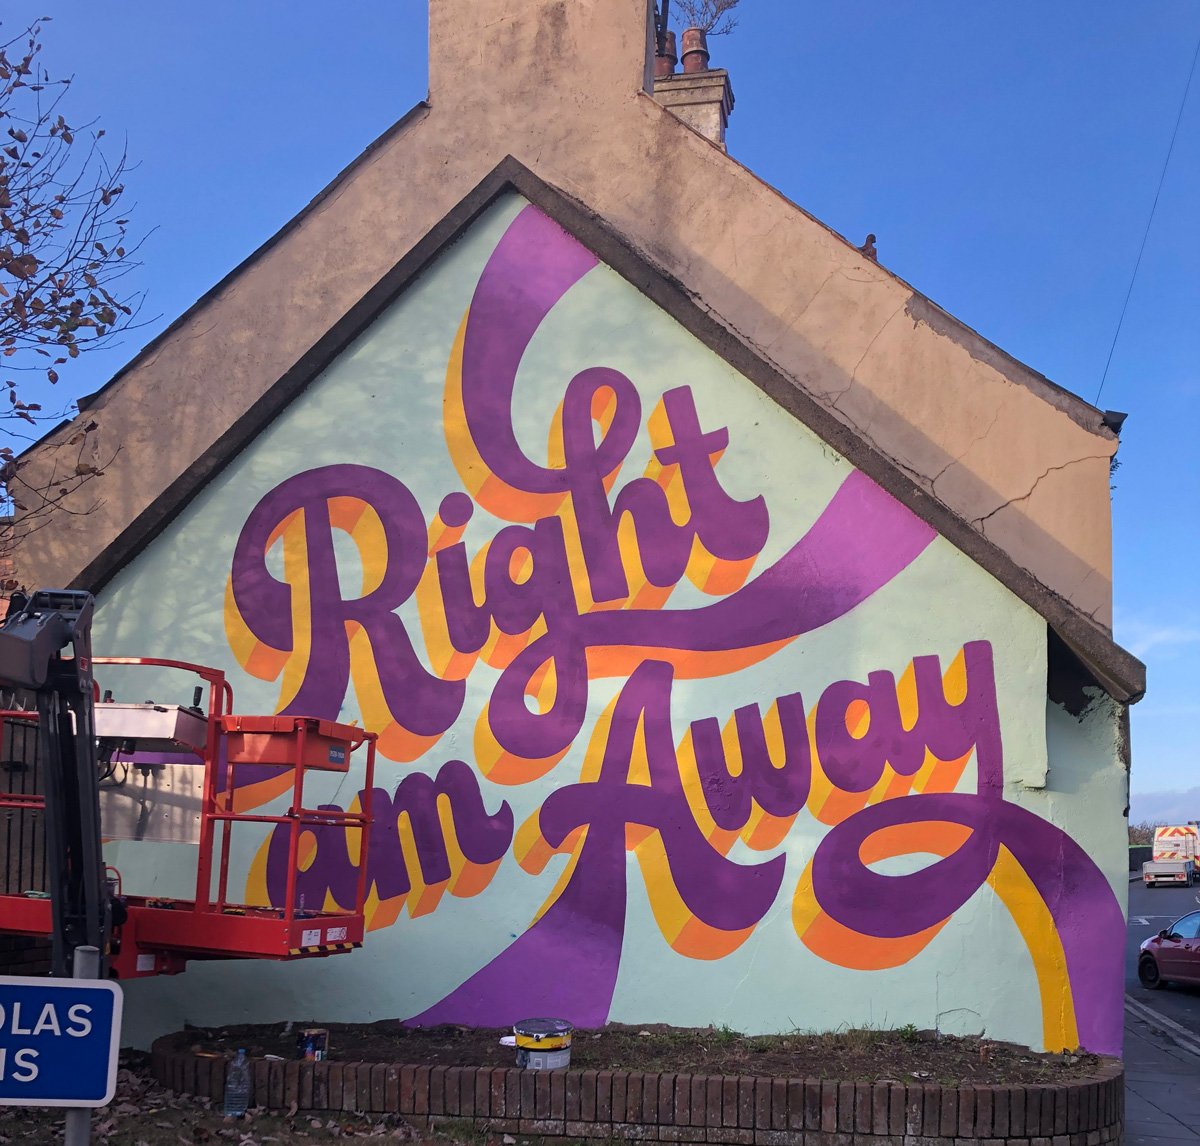
The photos below depict a mural project I completed in Dundalk, which I hope gives a good visual representation of the steps involved with the scribble grid technique.
If you have any questions or wish to commission a mural, please don't hesitate to reach out. I'm always enthusiastic about the opportunity of adding vibrancy to a wall near you.